
I have a home made tool for that at home, basically a round plate, pretty thick, with a threaded hole in the middle for a big bolt, and three smaller holes for bolts to go through and connect to the three bolts you take out. Loosen the big center bolt, then tighten the three smaller bolts to the cam gear, then turn the big bolt forcing the whole assembly off the came, once loose, the gear and the other part will come apart. I think the gear puller you have is tweaking the smaller gear part and putting preasure on the cam end, sort of working against yourself. I can take a picture of the tool, should be easy enough to make if you have some good steel stock...
Check out the factory manual, there;s a picture of the exact tool Sam describes. I have made this tool long ago, see it on:
www.alfapower.nu/gallery/album416 bottom of first page.
Jim K.
www.alfapower.nu/gallery/album416 bottom of first page.
Jim K.
Jim those are excellent pictures and your tool ideas will come in handy.By the way it was very good of your wife to allow you to use the living room carpet for photography it adds a touch of class ! I'll have to speak to mine  The living room would be a nice clean environment for engine re-assembly.
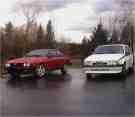
1986-GTV6
1989-75 Twinspark very sadly sold-remarkable sedan !
2014 Audi Q5 3.0l TDI - torque MONSTER
1989-75 Twinspark very sadly sold-remarkable sedan !
2014 Audi Q5 3.0l TDI - torque MONSTER

Thanks for the pic Jim.
Is that the only way to get the wheel off? I´ve heard people using a puller and some mild violence. I don´t have the resorses to make the tool at the moment and and there are no Alfa garages on the island I live. Could order one maybe...
Seb
Is that the only way to get the wheel off? I´ve heard people using a puller and some mild violence. I don´t have the resorses to make the tool at the moment and and there are no Alfa garages on the island I live. Could order one maybe...
Seb
Proud member of Team Rauk Race.
156 V6 24v -98
GTV6 3.0QV-83
75 3.0 Race Car "The raukster"
156 V6 24v -98
GTV6 3.0QV-83
75 3.0 Race Car "The raukster"
The tool is a copy of the actual AR tool Seb. If you don't have it, you do what we all do in such cases: improvise. Sometimes crowbars and other forms of brute force will work,but be careful not to bend the parts involved. May I suggest a little heating of the stuck wheel (not the cam) so that it will expand some (we hope). Don't overdo it though as you may destroy the camshaft seal on the head.
Good luck.
Good luck.

You can make this from your local hardware store. Some metal plate (doesn't have to be round) with the 3 holes drilled in it and a big hole in the center. Some allthread, 2 nuts, 2 washers and the 3 bolts.
Grind a point in the allthread to fit the center of the cam, put the allthread through the hole in the center of the plate. Use the nuts and washers on either side of the hole. Get everything in place then tighten the outside nut and loosen the inside nut creating stress on the plate to pull the cam sprocket off.
HTH
-Peter
The true joy of an Alfa Romeo is behind the wheel.
Problem solved!! 
After trying for a few days to get the cam wheel of with no success, i resorted to other methods. I went to Violence´s bigger brother, Distruction, for help.
I had earlier dismissed cutting the engine mount off because off the tight spot between the head and the wheel. But with some precision cutting with the angle grinder and som ol´ fashion elbow grease and a metal saw it worked.
Thanks for all your help guys!
Now on to other challanges!
Seb
- Attachments
-
- The pieces...
- MVC-010F.JPG (42.14 KiB) Viewed 10653 times
-
- The first cut
- MVC-007F.JPG (48.91 KiB) Viewed 10653 times
Proud member of Team Rauk Race.
156 V6 24v -98
GTV6 3.0QV-83
75 3.0 Race Car "The raukster"
156 V6 24v -98
GTV6 3.0QV-83
75 3.0 Race Car "The raukster"
Hello guys!
The head is now back in place with a new gasket and it´s starting to look like an engine again. I´m just waiting for my friend to deliver the modified plenum and 180 bend.
I even think I´m getting a grip on the wireing of the Motonic. I have three loose ends to sort out; a pink/white, a pink and a green/black. All comming from the Motronic stem.
The pink/white and the pink wire both comes from the fuel relay om the Motronic stem. I think the pink/white is going of to the fuel pump and the pink is supposed to get +12V ignition to the relay.
The green/black goes to the + on the coil and should get +12V ignition aswell.
Does anyone have any comment to this? I`d appreciate if someone knows I´m wrong (or right) would let me now.
More pics will come when something interesting has happened.
Peace brothers /Seb
Proud member of Team Rauk Race.
156 V6 24v -98
GTV6 3.0QV-83
75 3.0 Race Car "The raukster"
156 V6 24v -98
GTV6 3.0QV-83
75 3.0 Race Car "The raukster"

Hehe... sorry! Won´t happen again...  I´ve been in my other garage the past few days working on the track car. (75 3.0)
Let´s see, what´s happened with the GTV6 then... Well, I´ve started to hook up the wires from the motronic in the engine bay. Also I`v painted the fuel rails. They looked old and oxidated, so I decided to make them black. I´m using a "satin" black wich is really nice.
Will return with more pics soon.
Seb
- Attachments
-
- "Satin black" fuel rails
- MVC-022F.JPG (36.35 KiB) Viewed 10535 times
Proud member of Team Rauk Race.
156 V6 24v -98
GTV6 3.0QV-83
75 3.0 Race Car "The raukster"
156 V6 24v -98
GTV6 3.0QV-83
75 3.0 Race Car "The raukster"
At last the top is back and I got the cam belt back on this weekend. The new gear for the dizzy and oil pump works great. (Phieuu..., drying my forehead)
Also the generator is back, but I had to change the wheel on it fro it to line up. (pics below)
All night last nigth I spent putting the driveshaft in place without splitting it and with engine and gear box in place... not the most fun I´ve ever had But a few hours later it was done. (no pics, was too pissed off to remember...)
Seb
Also the generator is back, but I had to change the wheel on it fro it to line up. (pics below)
All night last nigth I spent putting the driveshaft in place without splitting it and with engine and gear box in place... not the most fun I´ve ever had
Seb
- Attachments
-
- MVC-002F.JPG (32.31 KiB) Viewed 10462 times
-
- MVC-001F.JPG (52.44 KiB) Viewed 10463 times
Proud member of Team Rauk Race.
156 V6 24v -98
GTV6 3.0QV-83
75 3.0 Race Car "The raukster"
156 V6 24v -98
GTV6 3.0QV-83
75 3.0 Race Car "The raukster"
Hi guys!
Finally I´ve recieved the parts i was waiting for. The modifyed plenum and the 180 bend. The plenum is ok, but the bend is too wide. It interfere with the wiper engine, needs to be tighter. Now I will have to rebuild it myself. If anyone has any idea how to fix it I welcome it.
I have to find a tighter bend to replace this one with. A friend made this one but I´m a bit disappointed of the result.
pics below
- Attachments
-
- MVC-004F.JPG (45.41 KiB) Viewed 10347 times
-
- MVC-005F.JPG (33.43 KiB) Viewed 10346 times
-
- MVC-010F.JPG (41.46 KiB) Viewed 10346 times
Proud member of Team Rauk Race.
156 V6 24v -98
GTV6 3.0QV-83
75 3.0 Race Car "The raukster"
156 V6 24v -98
GTV6 3.0QV-83
75 3.0 Race Car "The raukster"

Seb,
I personally would have turned the intake manifold 180 deg so that the intake is at the front, by doing what you have done you are asking air to do a U-turn into the intake chamber , this will cost you power - at least 5hp.
I personally would have turned the intake manifold 180 deg so that the intake is at the front, by doing what you have done you are asking air to do a U-turn into the intake chamber , this will cost you power - at least 5hp.
PanchoRama
From the great master Del Compo "so, wat you wan doin?"
High Five. Sexy Time. You Lose
From the great master Del Compo "so, wat you wan doin?"
High Five. Sexy Time. You Lose
-
Que Boludo

- Gold

- Posts: 83
- Joined: Sun Nov 28, 2004 9:02 pm
- Location: Australia Sydney