Page 4 of 5
Re: Alfa Romeo 75 3,0 V6 Gr. A Conversion from 12V to 24V
Posted: Wed May 14, 2014 3:43 am
by AlanV6
Great build!
Plenum looks like a clean and simple design. Maybe you could make some trumpets inside (should give even more flow)
I did them like this:

Re: Alfa Romeo 75 3,0 V6 Gr. A Conversion from 12V to 24V
Posted: Thu May 15, 2014 8:43 am
by Mats
Not as much as you would think and certainly not enough to redesign the current (done) part.
Re: Alfa Romeo 75 3,0 V6 Gr. A Conversion from 12V to 24V
Posted: Sat May 17, 2014 9:07 am
by Alfa 75 Racer
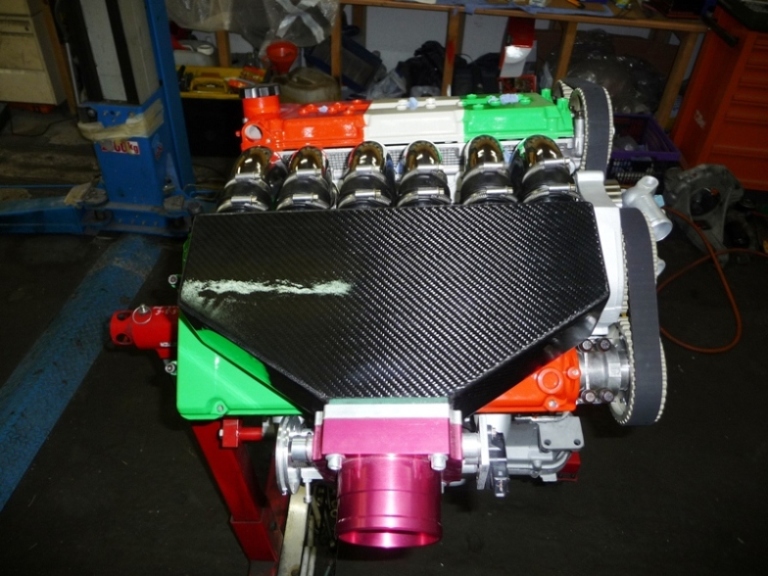
Good Evening Guys, some new pics of finished Carbon Plenum.
Already painted and now ready.
White stripes are reflexions of Neon lights !
Re: Alfa Romeo 75 3,0 V6 Gr. A Conversion from 12V to 24V
Posted: Tue Jun 03, 2014 1:33 pm
by Alfa 75 Racer
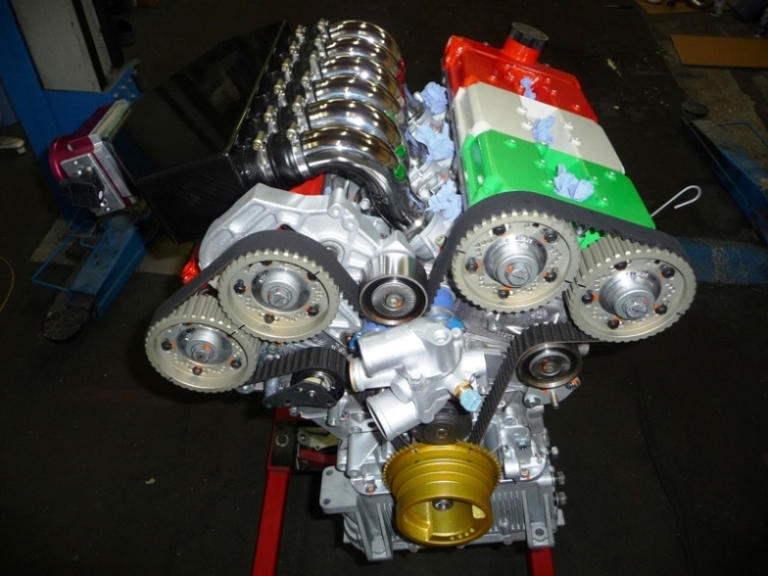
Good evening guys, here comes a small update of the conversion.
I don´t have much time at the moment so this is the reason for only small updates.
Here are some pics of the oil filter / oil cooler adapter where I´ve made a thread bolt to fix the adapter in place and it woun´t come loose during changing the oil filter and don´t loose because of the tourque force of the oil pipes / hoses.
Also assembled is now the complete oil sump including sump spacer to get enough clearance for the chain driven oil pump when using the 75 V6 sump.
Cat Cams Timing Disc is also fitted on the crank to find exact TDC Position, ... already installed is RH cylinder head and just to take a look how it fits, ... my Carbon intake plenum.
Re: Alfa Romeo 75 3,0 V6 Gr. A Conversion from 12V to 24V
Posted: Tue Jun 03, 2014 1:36 pm
by Alfa 75 Racer
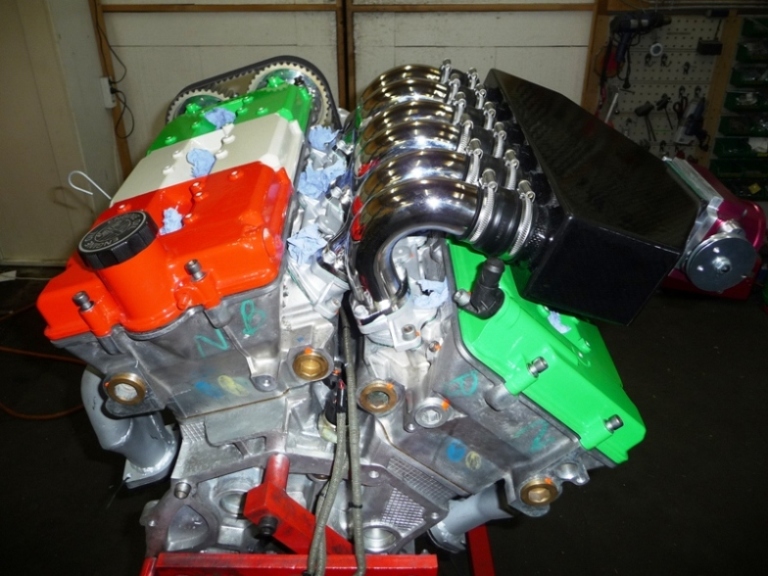
Some more Pics, ...
Cheers Wolfgang
Re: Alfa Romeo 75 3,0 V6 Gr. A Conversion from 12V to 24V
Posted: Tue Jun 03, 2014 3:09 pm
by kevin
Hi Wolfgang , that's a very clever easy solution to stop the adaptor coming loose . This is a problem on these conversions as some times when you loosen a very tight oil filter you can loosen the stud out the block . The adaptor bonds to the filter and acts as a lever when you turn it loose . Unfortunately you only know the studs loose when you doing 200km/h and your car is filled with smoke from oil spraying on the exhaust .

Look forward to seen the pics on how you mark the cams .
Re: Alfa Romeo 75 3,0 V6 Gr. A Conversion from 12V to 24V
Posted: Tue Jun 03, 2014 10:32 pm
by Jim K
Hi Wolfgang, nice progress!
Regarding the sandwich plate:
do not use as is! Enlarge internal passages as much as you can. There are sharp corners and small holes. It'll take you about an hour with the Dremel, but it'll be much better when you're done. Unscrew cap and remove the thermostat assembly Be careful grinding around the actual thermostat bore, test-fit without the spring. -I know, I have the same one. Fluids do not like sharp corners!

Jim K.
Re: Alfa Romeo 75 3,0 V6 Gr. A Conversion from 12V to 24V
Posted: Wed Jun 04, 2014 8:45 pm
by Alfa 75 Racer
Ciao and Good Morning Jim !
Thank you for the compliment !
About that helpful suggestion about the adapter plate, ... that´s really funny, ... I´ve started by myself this issue one day before you have given me that info, Jim.
I´ve seen that there are a lot sharp corners and also small sections inside.
Thank you again, Jim, ... just one more question about the cutout section at the thermostat !
Where should I take off material, ... do you mean just to create a bigger cutout where oil will get through when thermostat will open and oil flow will go through oil cooler (big circle) ?
What pipe / hose inner diameter do you suggest for oil lines to the cooler ? 10mm or 12 mm
Many sunny greetings from Austria
Wolfgang
Re: Alfa Romeo 75 3,0 V6 Gr. A Conversion from 12V to 24V
Posted: Thu Jun 05, 2014 12:18 am
by Jim K
Hi Wolfgang,
I don't have the exact details as the plate is on the car, but one area to be careful is the bore where the thermo pellet moves. Do not remove excess material there. The rest of the passages can be enlarged no problem. For pipes, I used -10 with alloy push-on fittings. I suppose -10 would also work fine too. ID throughout the system must be >11mm.
Jim K.
Re: Alfa Romeo 75 3,0 V6 Gr. A Conversion from 12V to 24V
Posted: Sat Jul 26, 2014 12:29 pm
by Alfa 75 Racer
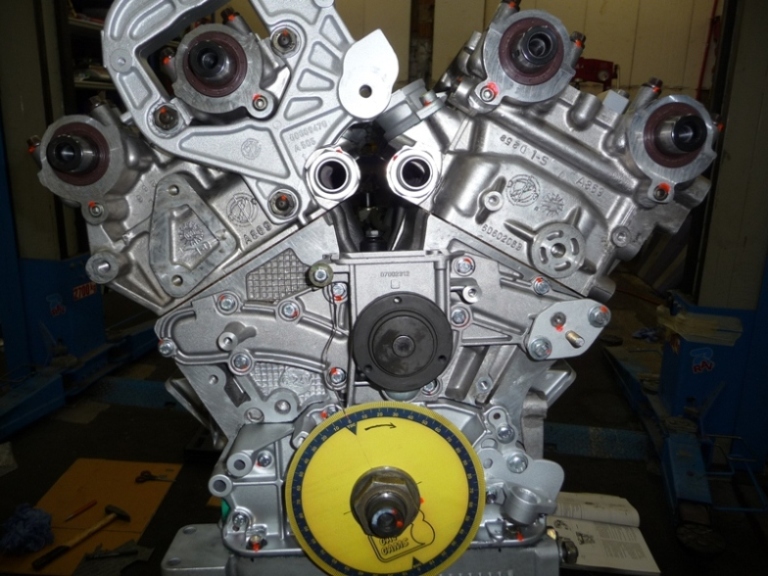
Good Evening guys, how are you, ... it´s time for an update of my 24 V conversion !
As I´ve quit my current job after 9 years because I will open my own workshop in Vienna in August so I will make my hobby to my job.
As I have now some holidays I´ve found some time for this update.
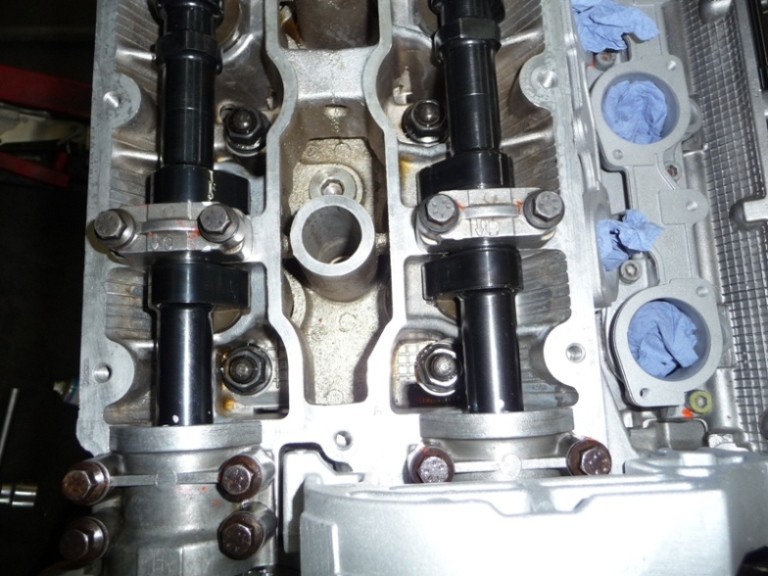
I´ve installed all cams with fine adjustments according data sheet of Cat Cams, those cams were really tricky to adjust but I´ve done it already.
Here a little describtion how I´ve done this installation and adjustments:
Before Installation of new hydraulic lifters and cams I turned back crank to a position where for sure no contact can be between pistons and valves.
I´ve taken original cam blockings of the 3,0 V6 24V, installed all 4 OEM cams to get a starting point and marked the profile on the blockings with an permanent marker.
Then I´ve installed my Cat Cam race cams with self made spacers under blockings because Cat Cams have much mor lift.
Re: Alfa Romeo 75 3,0 V6 Gr. A Conversion from 12V to 24V
Posted: Sat Jul 26, 2014 1:05 pm
by Alfa 75 Racer
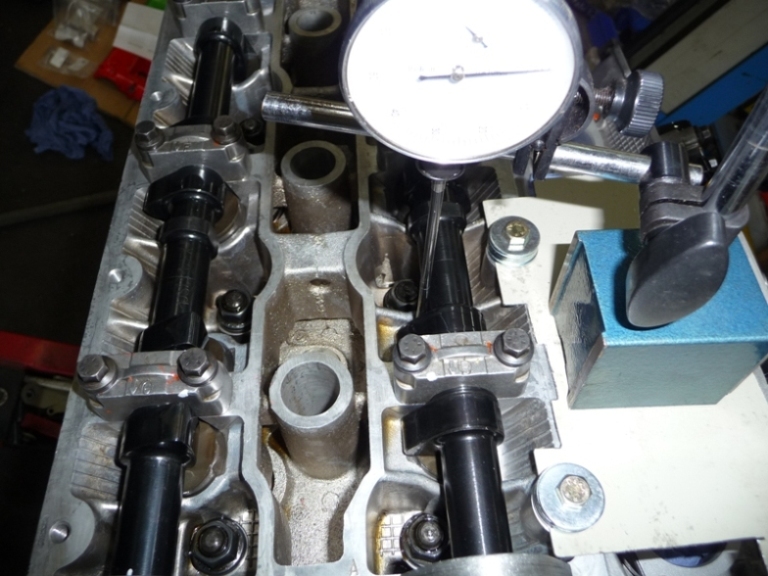
Describtion of next steps, ...
Installation of cam sealing rings and turning crank to TDC position of Cyl. 1.
- P1030152.JPG (229.25 KiB) Viewed 10505 times
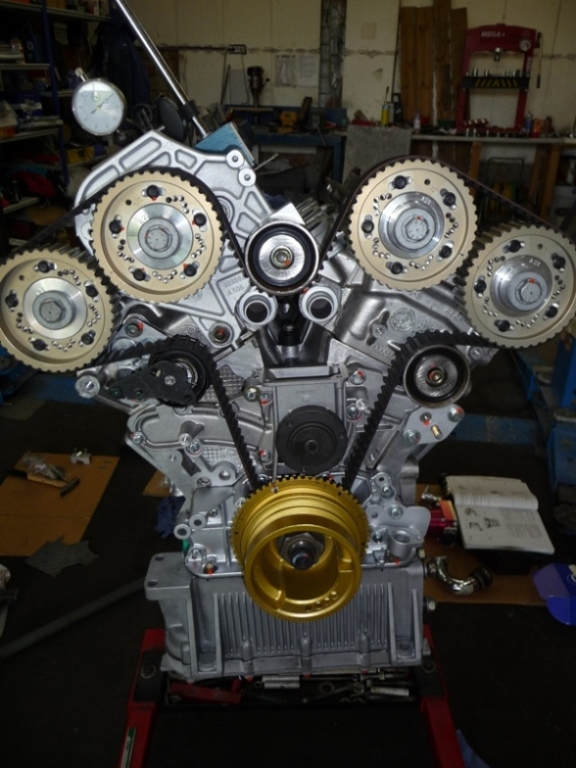
Installation of adjustable cam pullies and timing belt (cam pully screws still open so cams can be turned).

- P1030153.JPG (211.85 KiB) Viewed 10505 times
Installation of Front Pully.
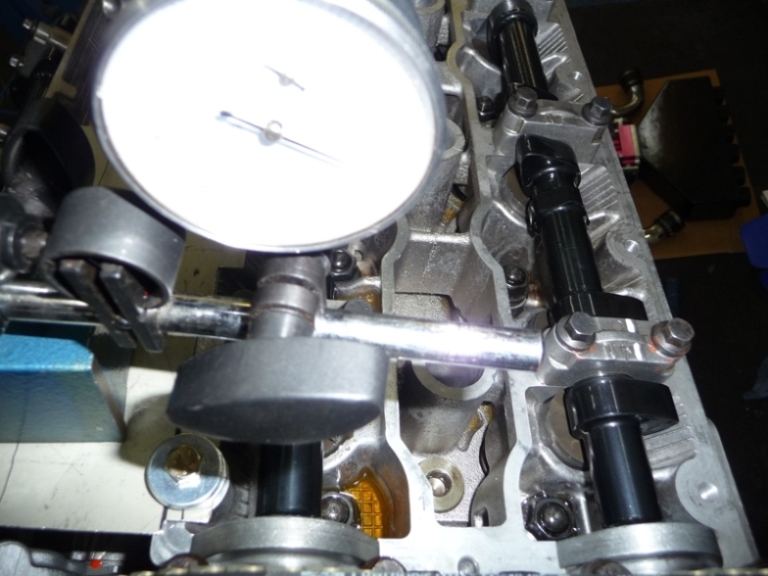
I´ve made a plate for the dial gauge which I can fit on cylinder heads on inlet and outlet sides.
I´ve started with adjustment of lift on cyl. 1 Inlet valve at TDC cyl. 1 according data sheet of Cat Cams.
- P1030157.JPG (253.29 KiB) Viewed 10505 times
- P1030158.JPG (217.85 KiB) Viewed 10505 times
Adjustment on cyl. 1 Outlet valve at TDC cyl. 1 according data sheet.
See the Overlapping !!!
- P1030159.JPG (243.03 KiB) Viewed 10505 times
Re: Alfa Romeo 75 3,0 V6 Gr. A Conversion from 12V to 24V
Posted: Sat Jul 26, 2014 1:35 pm
by Alfa 75 Racer
Next Steps, ...
I´ve printed out a timing disc on a self glueing folie for printers with the same ouside diameter as the front pully has on the timing disc for the crank sensor.

- P1030172.pully1.jpg (249.18 KiB) Viewed 10504 times
I´ve made some markings on cams for cyl. 1-2-3.
- P1030161.JPG (228.79 KiB) Viewed 10504 times
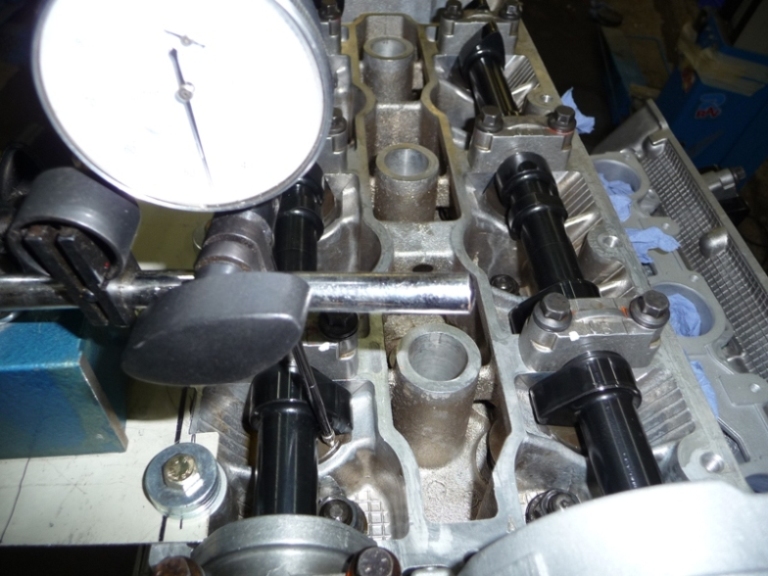
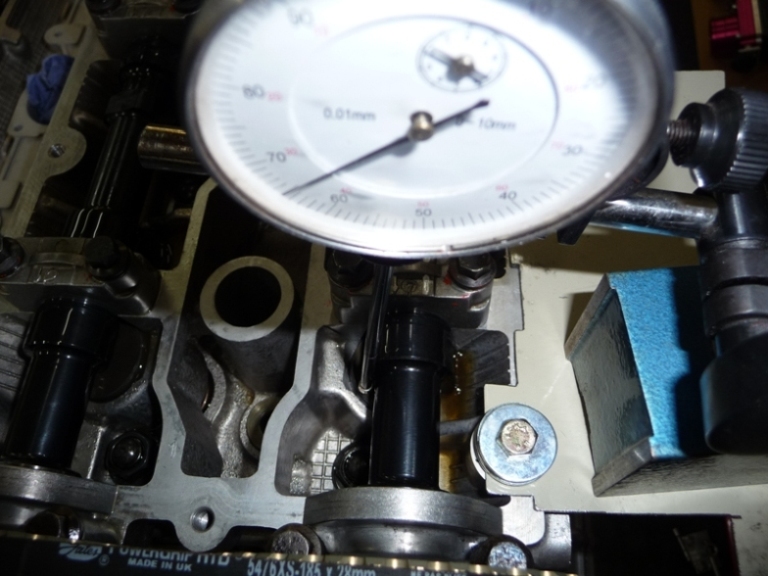
Next I´ve turned crank clockwise 120 Degrees to TDC position of cyl. 4 and fixed my self made plate for the dial gauge on cylinder head of cyl. 4-5-6.
Starting with Inlet valve adjustment on cyl. 4 according data sheet of Cat Cams.
- P1030163.JPG (221.77 KiB) Viewed 10504 times
Adjustment of Outlet valve on cyl. 4.
- P1030166.JPG (226.92 KiB) Viewed 10504 times
Re: Alfa Romeo 75 3,0 V6 Gr. A Conversion from 12V to 24V
Posted: Sat Jul 26, 2014 1:45 pm
by Alfa 75 Racer
At least I´ve made some markings on pullies at TDC position of cyl. 1 so I can see from the outside if timing is O.K.
- P1030172.JPG (231.87 KiB) Viewed 10504 times
Re: Alfa Romeo 75 3,0 V6 Gr. A Conversion from 12V to 24V
Posted: Sat Jul 26, 2014 1:57 pm
by Alfa 75 Racer
Re: Alfa Romeo 75 3,0 V6 Gr. A Conversion from 12V to 24V
Posted: Sat Jul 26, 2014 2:04 pm
by Alfa 75 Racer
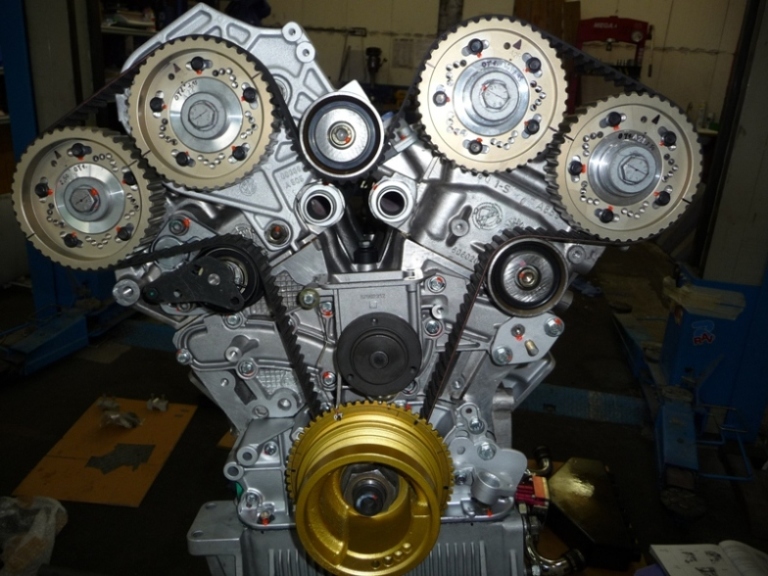
At least I will close my update with some pics of current status, ...

- P1030185.JPG (226.25 KiB) Viewed 10502 times
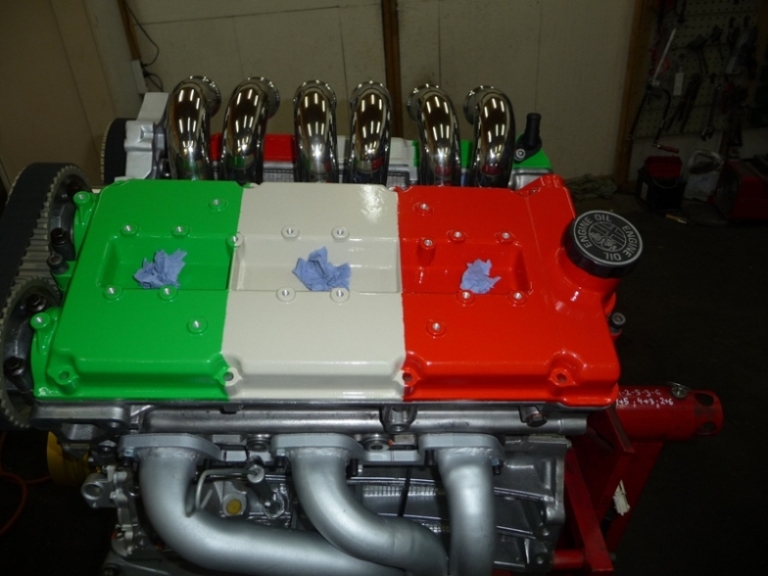
- P1030186.JPG (223.9 KiB) Viewed 10502 times
- P1030190.JPG (254.09 KiB) Viewed 10502 times
- P1030191.JPG (219.46 KiB) Viewed 10502 times
- P1030192.JPG (222.29 KiB) Viewed 10502 times
That´s it for now Guys !!!
New updates will follow, ...
Many greetings from Austria
Wolfgang