OK, here are some pics.
Overall - its getting closer. The alternator is done (still need a bloody belt), throttle is done, fuel is almost done.


Alternator setup...

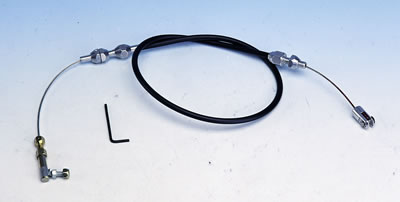
Throttle linkage:

The outer throttle cam is used only to tie the mechanism together and holds the (extra) return spring.

Fuel Pressure regulator - still need to get the correct size (5/16") fitting to connect the return port to the Alfa fuel plumbing.

Driver side header - too close to the body - can this be bent closer to the engine? Does it need to be heated first? Should this be done by a pro? I'll have the engine out and on a stand for final prep so it can be done then...

Passenger side header looks OK.

The fitting for the breather broke off since it was glued in and not welded. Need to take care of this somehow.

There are two locations for the crank case breather - bottom right of the passenger side cam cover or the one pictured (top left). Which is the best location to use as a crank breather? Considering using a better aftermarket breather - any recommendations?
Cheers,