Re: Building the supercharger to the engine (75 3.0V6)
i can take a few extra pictures for you. But not right away. The car isn't standing at my home. It's a 10 mile drive.
Re: Building the supercharger to the engine (75 3.0V6)
gtv-racer wrote:i can take a few extra pictures for you. But not right away. The car isn't standing at my home. It's a 10 mile drive.
Great! thanks a lot man!
Re: Building the supercharger to the engine (75 3.0V6)
mmm, trying to connect my computer to my phone for the pictures of the gearbox mounts, trouble! Always the same with phones and connecting problems. It's shi......
Restarted everything. still no response.... Will try agian these days..
Restarted everything. still no response.... Will try agian these days..
Re: Building the supercharger to the engine (75 3.0V6)
It's a miracle. just in 5 times trying today it connected  .
.
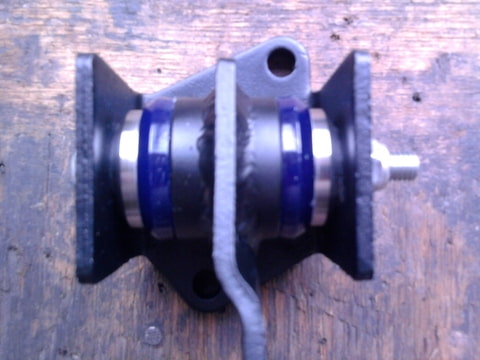
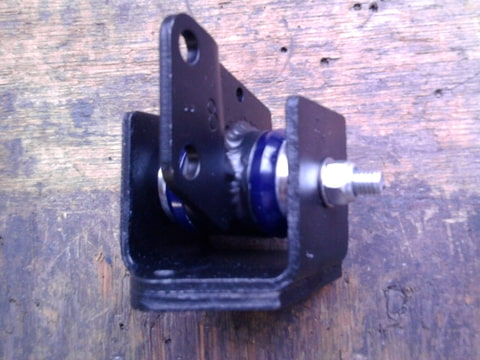
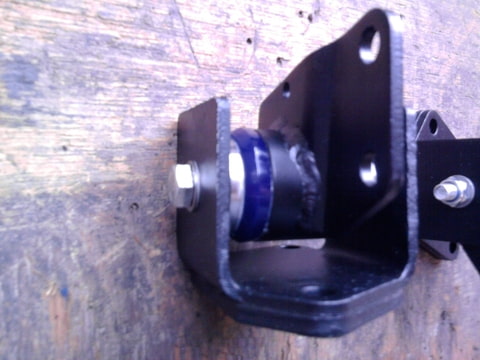
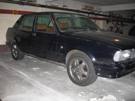
So, how did i made them?
-First you drill a hole trouhg the old assembly (with the rubber stil between it) 8mm.
-Then you put the mounts in the oven and make the tempruture up to 300 degrees. The rubber will decompose. (make sure you measured the ofsett of the centre plate and marked wich plate was with wich mount!!!)
-Mill a hole in the centre plate for the bigger tube aligned with the 8mm hole.
-weld a tube in.
-on a lathe you turn some bushes.
-alssemble the hole thing.
I used superflex SF 2319116 bushes wich where the longest i couls find.
Re: Building the supercharger to the engine (75 3.0V6)
Thanks a lot man! will give it a try over here! 

Re: Building the supercharger to the engine (75 3.0V6)
gtv-racer
Top job !! This is even better than Barry's last version. Not entirely necessary for a race car cause the bolt is enough but great for a street car where vibration dampening is desirable.
Now see if you can invent a good engine mount along the same lines that doesn't rip apart..
Top job !! This is even better than Barry's last version. Not entirely necessary for a race car cause the bolt is enough but great for a street car where vibration dampening is desirable.
Now see if you can invent a good engine mount along the same lines that doesn't rip apart..
Transaxle Alfas Haul More Arse
Re: Building the supercharger to the engine (75 3.0V6)
Thanks MD. Didn't know original engine mounts are also a weak spot...
When my new one's fail, i will built some new. Think with 2 of the same bushes of the gearbox mount's per engine mount. That's got to do the job.
The gearbox mount idea is btw from this forum. Thought is was Mats idea.
When my new one's fail, i will built some new. Think with 2 of the same bushes of the gearbox mount's per engine mount. That's got to do the job.
The gearbox mount idea is btw from this forum. Thought is was Mats idea.
Re: Building the supercharger to the engine (75 3.0V6)
Umm ? not sure if it was Mats or Barry but I do know the last version Barry made refined the idea to allow some leeway for movement but not that much that the mount could delaminate. I am sure Mats will chime in if he needs to clarify.
With respect to the engines, the LHS mount can delaminate from torque twist of the engine from brutal starts. I suppose there are a couple of solutions. One is alog the lines of a captive round rubber bush and the other is to leave the original mount and install an engine movement restriction bar with appropriate rubber bushes to isolate vibration...
With respect to the engines, the LHS mount can delaminate from torque twist of the engine from brutal starts. I suppose there are a couple of solutions. One is alog the lines of a captive round rubber bush and the other is to leave the original mount and install an engine movement restriction bar with appropriate rubber bushes to isolate vibration...
Transaxle Alfas Haul More Arse

Re: Building the supercharger to the engine (75 3.0V6)
I'm not sure anyone can "claim" that idea, it's a common way to make mounts.
I'm working on an adjustable version though, to be able to adjust the propshaft joint angles. Might be a good way to save time.
For the engine I think you should try to ger som NBR (Natural Rubber) mounts, the PU bushings have poor hysteresis characteristics which will make them appear harder -> more vibrations and load into engine and body. I think you need a larger diameter bushing too or it will probably fail prematurely.
Might me a good idea to make them "loose" so you can shim them in situ. It can be frustrating when the holes in the bushing and the other part of the mount don't line up.
Mats Strandberg
-Scuderia Rosso- Now burned to the ground...
-onemanracing.com-
-Strandberg.photography-
GTV 2000 -77 - Died in the fire.
155 V6 Sport -96 - Sold!
-Scuderia Rosso- Now burned to the ground...
-onemanracing.com-
-Strandberg.photography-
GTV 2000 -77 - Died in the fire.
155 V6 Sport -96 - Sold!
Re: Building the supercharger to the engine (75 3.0V6)
Mats makes a good point about using PU for the engine mounts. I made some for my car (not a GTV by the way) using PU suspension bushes and found they allowed a really nasty resonance/harshness to build up around 2-3500 rpm. I reverted to the rubber mounts after that. Shame, as the PU ones held the motor in good and tight, whereas the rubber ones allow rather more movement than I'd like.
I should add...I fitted these new mounts at the same time as a new engine....and spent an awful long time looking for a non-existent rev-related misfire, then blaming assorted other things before deciding that I'd ask the chap who balanced the engine for me. First question he asked was about the mounts - he gets it all the time, as folk tend to blame poor balance for resonance problems.
I should add...I fitted these new mounts at the same time as a new engine....and spent an awful long time looking for a non-existent rev-related misfire, then blaming assorted other things before deciding that I'd ask the chap who balanced the engine for me. First question he asked was about the mounts - he gets it all the time, as folk tend to blame poor balance for resonance problems.
Re: Building the supercharger to the engine (75 3.0V6)
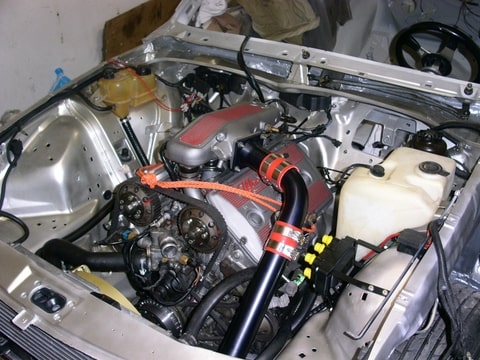
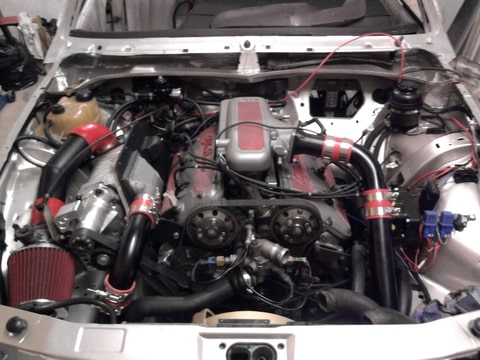
Did al lot of work. Painted the engine bay. Engine inspection. New Qv cams. Installed the DIS.
tada:
tada:
Re: Building the supercharger to the engine (75 3.0V6)
Nice workgtv-racer wrote:Did al lot of work. Painted the engine bay. Engine inspection. New Qv cams. Installed the DIS.
tada:
85' 3L GTV6(White) number 197off 212, 3.5L
83' 3L GTV6 (Red) number 46 off 212
03' 156GTA(Red)3.7L Turbo
06' 147GTA(Blue)3.8L+6XITB's
83' 3L GTV6 (Red) number 46 off 212
03' 156GTA(Red)3.7L Turbo
06' 147GTA(Blue)3.8L+6XITB's
Re: Building the supercharger to the engine (75 3.0V6)
Engine done so far. It already started (not good though without tune)
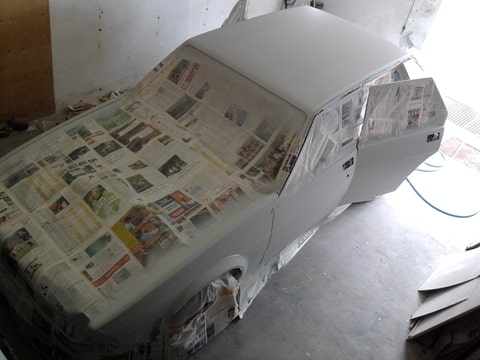
Then the paint sprayer came , now she's white like a virgin
The finish layer is'nt on yet. It is gona be Baincao Argento 021. (original color)That sounds a lot better in italian as in dutch. We call it somthing like champaign...
Then the paint sprayer came , now she's white like a virgin
The finish layer is'nt on yet. It is gona be Baincao Argento 021. (original color)That sounds a lot better in italian as in dutch. We call it somthing like champaign...
Re: Building the supercharger to the engine (75 3.0V6)
It's sprayed and alive again. Stil needs a lot of tuning tough.
http://www.youtube.com/watch?v=YGSzpcpC9XY
Let the built of begin
http://www.youtube.com/watch?v=YGSzpcpC9XY
Let the built of begin
-
Greg Gordon
- Verde

- Posts: 1552
- Joined: Mon Nov 29, 2004 7:06 pm
Re: Building the supercharger to the engine (75 3.0V6)
It's looking good. That's a lot of supercharger belt, slippage won't be a problem!
Greg,
www.hiperformancestore.com
www.okinjectors.com
Greg,
www.hiperformancestore.com
www.okinjectors.com